
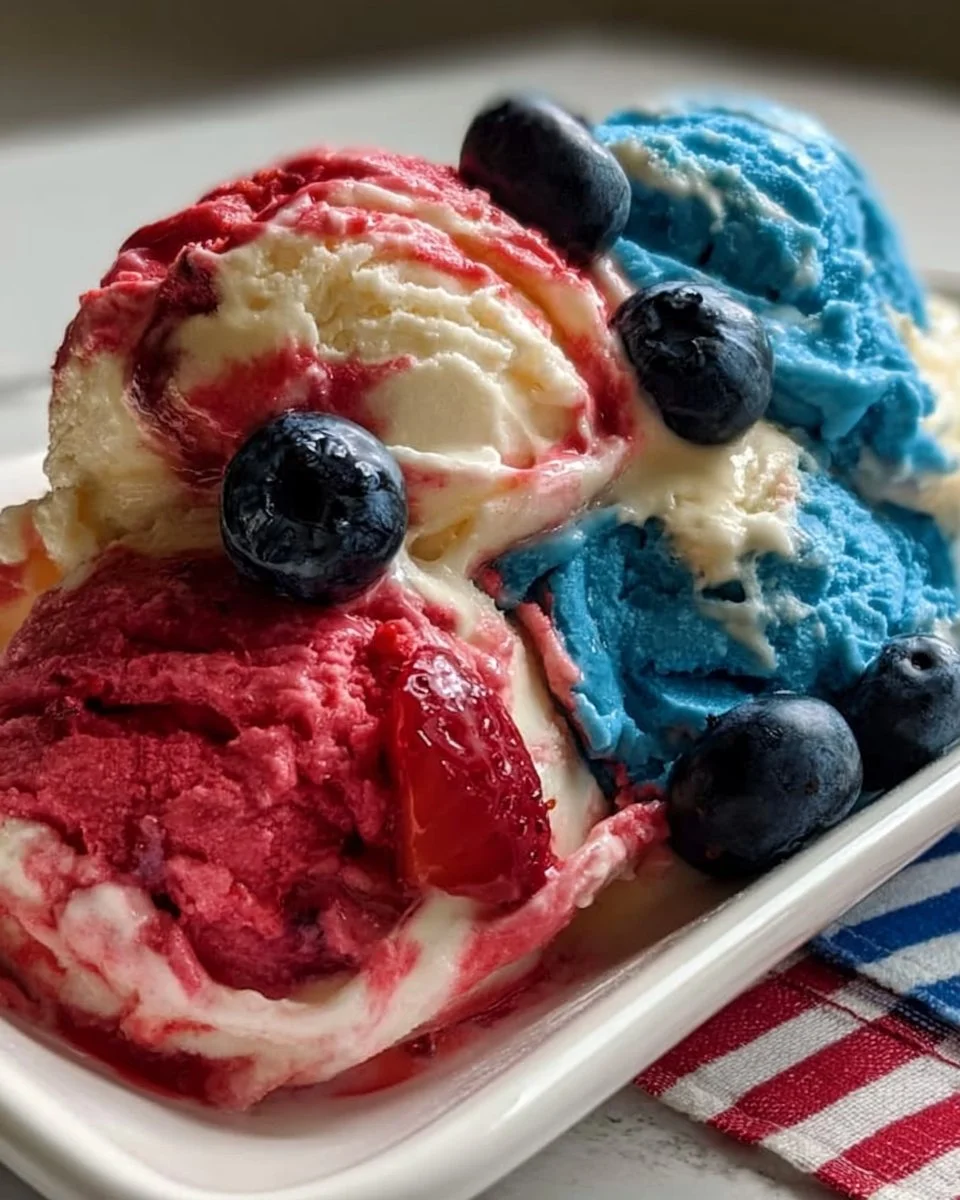
Red, White, and Blue Ice Cream is the perfect festive treat for summer celebrations. Honestly, there’s something special about scooping into a vibrant dessert that captures the colors of a patriotic holiday. I remember the first time I made this ice cream—it was the 4th of July, and I wanted to create something that would impress my friends and family. Spoiler alert: it did!
When you make this delightful dessert, you’ll not only wow your guests, but you’ll also create sweet memories while swirling vibrant colors and luscious flavors together. Let’s dive in!
Why You’ll Love This Red, White, and Blue Ice Cream
Imagine creamy, dreamy layers of red strawberries, smooth white vanilla, and vibrant blue blueberries, all working together in perfect harmony. This Red, White, and Blue Ice Cream recipe is perfect for quick meals, easy snacks, or special occasions.
It’s a no-churn ice cream, so you won’t need any fancy equipment (trust me, this makes it accessible for everyone). Plus, it’s a fun and interactive recipe. Whether you’re making it for a barbecue, a picnic or just for the love of ice cream, it’s bound to become a summertime favorite!
Preparation Phase & Tools to Use
Before diving into the recipe, let’s gather our tools. You’ll need:
- A large mixing bowl
- A hand mixer or stand mixer
- Three bowls (or just rinse out your large bowl for the colors)
- A spatula
- A freezer-safe container
When I made this in my kitchen, I found it easier to have everything prepped and within reach. Nothing complicated here, just a bit of organization makes the process smoother!
Ingredients for Red, White, and Blue Ice Cream
To whip up this delightful dessert, you’ll need:
- 2 cups heavy cream
- 1 cup sweetened condensed milk
- 1 teaspoon vanilla extract
- Red food coloring
- Blue food coloring
- Fresh strawberries, chopped
- Fresh blueberries
You might want to taste-test the strawberries before adding them to see if they need a little sugar—you know, just to ensure that flavor pops.
How to Make Red, White, and Blue Ice Cream at Home
Ready to get started? Here’s how to create this festive treat:
-
In a large mixing bowl, whip the heavy cream until stiff peaks form. This is crucial for that fluffy texture. Just be careful not to overdo it; you don’t want it turning into butter!
-
Gently fold in the sweetened condensed milk and vanilla extract until fully combined. Keep your hand light; you want to keep as much air in there as possible for creaminess.
-
Divide the mixture into three separate bowls.
-
In one bowl, add red food coloring and chopped strawberries, mixing until well combined. You can adjust the color to your liking—just a few drops for a soft pink or more for vibrant red!
-
In the second bowl, leave the mixture white.
-
In the third bowl, add blue food coloring and fresh blueberries, mixing until well combined.
-
Now, here comes the fun part. In a large container, layer the red, white, and blue mixtures in that order.
-
Swirl the mixtures gently with a knife to create a marble effect. Don’t overmix here; those beautiful colors deserve to shine!
-
Cover and freeze for at least 6 hours or until solid. Trust me, it’s worth the wait!
-
Once ready, scoop and serve to enjoy this festive treat. Look at those colors!
Pro Tips for Best Results
- Quick tip: don’t skip the whipping step! This is what gives the ice cream its lovely, airy texture.
- To make layering easier, try adding the mixtures while your base is still slightly soft.
- If you want a deeper color, feel free to add more food coloring gradually.
Variations & Customization Ideas
Feeling a bit creative? Here are some fun ideas:
- Swap the strawberries for raspberries for a different red twist.
- Add crushed graham crackers to the white layer for a little crunch.
- Want a tropical vibe? Throw in some pineapple with the blueberries!
There’s just so much room for creativity!
Common Mistakes to Avoid
Most people miss this step: be patient when whipping the cream! If you rush it, you could end up with a mixture that won’t hold its shape.
Also, don’t forget to check the temperature of your freezer. Sometimes, it might not be cold enough, and you’ll find your ice cream is still a bit mushy the next day.
What to Serve With Red, White, and Blue Ice Cream
This ice cream can stand proudly on its own, but if you’re looking to take it up a notch, serve it with:
- Fresh fruit on the side
- Homemade brownies or cookies
- Whipped cream and sprinkles for extra festiveness
Just think about those summer BBQ vibes!
Storage & Reheating Instructions
Store your Red, White, and Blue Ice Cream in a freezer-safe container for up to two weeks. Just remember to cover it tightly to prevent ice crystals from forming. Reheating isn’t necessary—this dessert is all about being served straight from the freezer!
Estimated Nutrition Information
While I can’t provide exact details without getting too technical, just keep in mind that this is an indulgent treat. Enjoy it in moderation—because, honestly, it’s so rich and creamy, a scoop (or two) will satisfy your cravings.
FAQs
1. Can I use a different type of milk?
Using alternative milks like almond or coconut might change the consistency, but you can experiment!
2. How long does this ice cream take to freeze?
Plan on at least 6 hours, but overnight is best.
3. Can I make this dairy-free?
Definitely! Use coconut cream and vegan condensed milk.
4. How do I get the layers to look nice?
Scoop carefully and always layer gently to keep those beautiful colors intact!
5. Can I use frozen fruits?
You can, but be aware they may release extra moisture. Drain them first to avoid watery ice cream.
Expert Tips for the Best Red, White, and Blue Ice Cream
- When measuring the heavy cream, make sure it’s cold for better whipping!
- If you aren’t keen on using food coloring, you could blend some freeze-dried fruit into the mixtures for natural colors.
- Finally, stash a batch in the freezer for when friends drop by unexpectedly—you’ll be ready!
Conclusion
This Red, White, and Blue Ice Cream is not just a dessert; it’s a way to create memories and celebrate moments with those you love. With rich creaminess, vibrant colors, and delightful flavor, it’s hard not to indulge in this festive favorite! So, save this recipe for later and don’t forget to try it out at your next gathering. You’ll definitely impress your guests. Enjoy!
Print
Red, White, and Blue Ice Cream
- Total Time: 360 minutes
- Yield: 8 servings 1x
- Diet: Vegetarian
Description
A festive no-churn ice cream featuring layers of strawberries, vanilla, and blueberries, perfect for summer celebrations.
Ingredients
- 2 cups heavy cream
- 1 cup sweetened condensed milk
- 1 teaspoon vanilla extract
- Red food coloring
- Blue food coloring
- Fresh strawberries, chopped
- Fresh blueberries
Instructions
- In a large mixing bowl, whip the heavy cream until stiff peaks form.
- Gently fold in the sweetened condensed milk and vanilla extract until fully combined.
- Divide the mixture into three separate bowls.
- In one bowl, add red food coloring and chopped strawberries, mixing until well combined.
- In the second bowl, leave the mixture white.
- In the third bowl, add blue food coloring and fresh blueberries, mixing until well combined.
- Layer the red, white, and blue mixtures in a large container.
- Swirl the mixtures gently with a knife to create a marble effect.
- Cover and freeze for at least 360 minutes or until solid.
- Scoop and serve to enjoy this festive treat.
Notes
Make sure to whip the cream properly for a fluffy texture and adjust food coloring to achieve desired vibrancy.
- Prep Time: 15 minutes
- Cook Time: 0 minutes
- Category: Dessert
- Method: Freezing
- Cuisine: American
Nutrition
- Serving Size: 1 serving
- Calories: 300
- Sugar: 22g
- Sodium: 90mg
- Fat: 24g
- Saturated Fat: 14g
- Unsaturated Fat: 8g
- Trans Fat: 0g
- Carbohydrates: 27g
- Fiber: 1g
- Protein: 3g
- Cholesterol: 80mg