
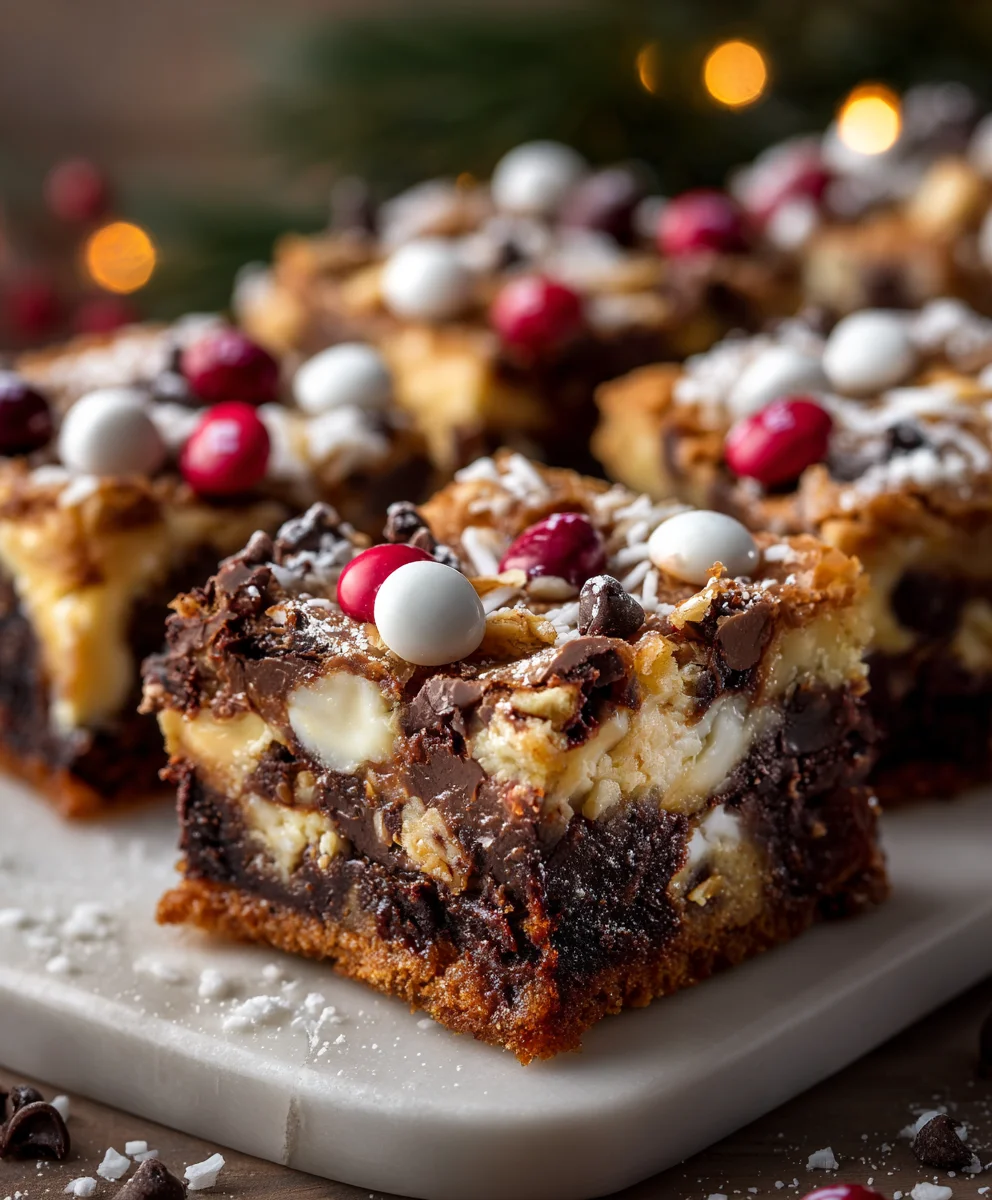
Introduction to Christmas Magic Layer Brownie Bars
As the holiday season approaches, my kitchen transforms into a delightful zone of sweet aromas and joyful chaos. It’s during these busy days that I often find myself reaching for a recipe that embodies festive cheer, like my Christmas Magic Layer Brownie Bars. These bars are not only a quick solution for when guests drop by unexpectedly, but they also pack a taste of nostalgia in every bite. Rich chocolate, tropical coconut, and vibrant holiday colors come together, making them perfect treats to impress your loved ones or indulge your family with warm smiles.
Why You’ll Love This Christmas Magic Layer Brownie Bars
First off, these bars are a breeze to whip up, which is a blessing during the busy holiday season. In just one hour, you’ll have a delicious dessert that blends rich flavors and festive colors, sure to make anyone’s day. Plus, they’re incredibly versatile! Whether you’re sharing them at a party or keeping them for family movie night, they always bring smiles and joy. It’s Christmas magic in every bite!
Ingredients for Christmas Magic Layer Brownie Bars
Gathering the right ingredients is the first stepping stone to baking these delightful Christmas Magic Layer Brownie Bars. Here’s what you’ll need:
- Semi-sweet chocolate chips: These are the heart of your brownie base, providing that rich chocolatey flavor we all crave.
- Salted butter: It adds both flavor and moisture, helping to create that fudgy texture we love in brownies.
- Granulated sugar: This sweetens the mix and enhances the overall flavor, while also contributing to the perfect brownie structure.
- Eggs: They bind everything together and add lightness, making your bars luscious and rich.
- All-purpose flour: The backbone of your brownie, it gives the baked goods their structure—too much, and they will be dry; too little, and they won’t hold together.
- Vanilla extract: Just a splash elevates the flavors and brings out the chocolatey goodness.
- Nuts (optional): Chopped nuts can add a delightful crunch. You can use walnuts or pecans, or simply omit them if you prefer a smooth texture.
- Holiday M&Ms: These colorful candies add pops of color and a sweet crunch, making your bars festive and fun. Mini ones work great for the top layer!
- Sweetened flaked coconut: A classic holiday ingredient that brings a delightful chewiness and a hint of tropical flavor to the mix.
- Sweetened condensed milk: This magical ingredient adds moisture and helps bind all the lovely toppings together, providing that gooey texture.
- Holiday sprinkles: A whimsical finishing touch! They make your bars sparkle like a winter wonderland in dessert form.
For exact measurements, check at the bottom of this article to easily print the recipe and keep it handy. Happy baking!

How to Make Christmas Magic Layer Brownie Bars
Step 1: Prepare Your Baking Pan
Start by preheating your oven to 350 degrees F. It’s like setting the stage for a holiday performance! Line a 9-inch baking pan with foil or parchment paper, ensuring it hangs over the edges. This will make removing the bars a breeze later. Spray it with nonstick cooking spray to keep everything from sticking to their cozy home.
Step 2: Melt the Chocolate and Butter
In a large, microwave-safe bowl, combine the salted butter and semi-sweet chocolate chips. Heat them in the microwave for 30 seconds. Stir and continue microwaving in 30-second intervals until melted and smooth. The aroma is simply divine! Remember, don’t rush this; it’s all about achieving that luxurious, silky texture.
Step 3: Mix in Eggs and Sugar
Now, it’s time to add the granulated sugar into your chocolate mixture. Stir it in like you’re blending together holiday cheer! Then add the eggs and the egg yolk, along with a splash of vanilla extract. Mix until smooth. This luscious batter is the secret to the fudgy goodness of your Christmas Magic Layer Brownie Bars.
Step 4: Combine with Flour
Sift in the all-purpose flour, but don’t overmix. Just stir until combined—think of it as gently folding in your joy and excitement. Too much mixing will make your bars tough. We want them to be delightfully chewy and soft!
Step 5: Bake the Base
Pour the brownie batter into your prepared baking pan, spreading it evenly. Bake in your preheated oven for about 20 minutes. Check for doneness; it should be slightly jiggly in the middle but set on top. This is crucial for that delicious initial layer!
Step 6: Layer the Toppings
Now comes the fun part! Once the base is out, evenly layer half of the nuts, chocolate chips, mini and regular holiday M&Ms, and all of the coconut. Then, drizzle the sweetened condensed milk generously over everything. Trust me, it’s like a warm hug for your brownie base! Finish by sprinkling the remaining toppings. It’s a colorful sight, perfect for the holidays.
Step 7: Final Bake
Pop your wonderfully topped creation back into the oven. Bake for an additional 25 minutes, or until the edges are golden and the center is set. Keep an eye on it—if it’s browning too quickly, cover gently with foil. We want everything to come together beautifully, not crispy!
Step 8: Cooling and Cutting
Once baked to perfection, let the bars cool completely in the pan. Removing them before they’re cool might just crumble the magic! Once cooled, lift them out using the overhanging foil or parchment. Finally, slice them into squares and prepare for the delighted smiles that are sure to follow.
Tips for Success
- Use room temperature eggs for better mixing.
- If you love coconut, feel free to add extra flakes on top!
- To keep bars fudgy, avoid overbaking. They should be set but slightly soft.
- Let them cool completely before cutting for cleaner squares.
- Store in an airtight container to maintain freshness for up to a week.

Equipment Needed
- 9-inch Baking Pan: You can use a glass or metal pan; just remember to adjust baking times if using glass.
- Microwave-Safe Bowl: A heatproof mixing bowl is essential for melting chocolate and butter.
- Offset Spatula or Spoon: For spreading the brownie batter and toppings evenly.
- Mixing Bowls: Having multiple bowls makes mixing different components a breeze.
Variations
- Gluten-Free Option: Substitute all-purpose flour with gluten-free flour for a delicious gluten-free treat that everyone can enjoy!
- Nut-Free Version: Omit the nuts completely if you’re cooking for anyone with nut allergies. You’ll still have plenty of texture and flavor without them.
- Minty Twist: Add a teaspoon of peppermint extract for a refreshing minty flavor. Perfect for those who adore seasonal minty treats!
- Dark Chocolate Lovers: Swap semi-sweet chocolate chips for dark chocolate chips. You’ll get a richer, less sweet dessert that’s absolutely decadent.
- Dairy-Free Delight: Use non-dairy butter and dairy-free chocolate chips to create a vegan-friendly version of these festive bars.
Serving Suggestions for Christmas Magic Layer Brownie Bars
- Pair with a scoop of vanilla ice cream for a delightful dessert experience.
- Serve with a warm cup of hot cocoa topped with marshmallows for that holiday feel.
- Garnish with whipped cream and a sprinkle of extra holiday sprinkles for a festive touch.
- Platter them on a decorative dish to impress your guests during holiday gatherings.
- Enjoy with a side of fresh berries for a refreshing contrast to the rich brownies.
FAQs about Christmas Magic Layer Brownie Bars
Can I make Christmas Magic Layer Brownie Bars ahead of time?
Absolutely! These bars can be made a day or two in advance. Just store them in an airtight container at room temperature. They taste even better after the flavors have mingled a bit!
What can I use instead of sweetened condensed milk?
If needed, you can substitute sweetened condensed milk with a mixture of one cup of milk and one cup of sugar, simmered until thickened. It works as a great alternative for those who prefer homemade versions!
How do I know when my bars are done baking?
Check for that golden edge and pulled-together center. It should be set but still slightly jiggly in the middle. A toothpick inserted should come out with a few moist crumbs. Perfectly baked Christmas Magic Layer Brownie Bars await!
Can I freeze these brownie bars?
Yes, you can! Just be sure to wrap them tightly in plastic wrap and store them in an airtight container. They can last in the freezer for up to two months. When you’re ready to enjoy, let them thaw at room temperature.
What’s the best way to cut these bars?
Once cooled, lift the entire batch out using the foil or parchment paper. Use a sharp knife, dipped in warm water, to slice them into neat squares. This helps avoid crumbling and keeps those layers intact!
Final Thoughts
As I think back on my experiences baking these Christmas Magic Layer Brownie Bars, I can’t help but smile. Each bite is a reminder of sweet family gatherings and cozy moments shared around the table. They bring warmth and joy, not only satisfying our sweet tooth but also wrapping our hearts in nostalgia. Whether you’re a busy mom or a professional navigating the holiday hustle, these bars make it easier to create those festive memories without fuss. So, gather your loved ones, bake up a batch, and let the magic unfold this Christmas!
Print
Christmas Magic Layer Brownie Bars
- Total Time: 1 hour
- Yield: 9 squares 1x
- Diet: Vegetarian
Description
Delicious Christmas Magic Layer Brownie Bars combining rich brownie, coconut, and festive toppings for a delightful treat.
Ingredients
- 1½ cups semi-sweet chocolate chips
- ½ cup salted butter (1 stick)
- 1 cup granulated sugar
- 2 large eggs
- 1 large egg yolk
- 1 cup all-purpose flour
- ½ teaspoon vanilla extract
- ¾ cup nuts (optional, divided)
- ¼ cup mini holiday M&Ms (divided)
- ¾ cup regular holiday M&Ms (divided)
- ½ cup semi-sweet chocolate chips (divided)
- 1 cup sweetened flaked coconut
- ¾ cup sweetened condensed milk (from a 14-ounce can)
- ¼ cup holiday sprinkles
Instructions
- Preheat your oven to 350 degrees F. Line a 9-inch baking pan with foil or parchment paper, then spray with nonstick cooking spray.
- Place the butter and semi-sweet chocolate chips in a large, microwave-safe bowl. Microwave on high for 30 seconds, then stir. Continue microwaving in 30-second intervals until melted and smooth.
- Beat granulated sugar into the chocolate mixture. Add vanilla and eggs, mixing until smooth.
- Stir in the all-purpose flour just until combined, then pour the batter into the prepared pan.
- Bake for 20 minutes until slightly jiggly but set on top.
- Evenly layer half of the nuts, half of the chocolate chips, half of the mini and regular holiday M&Ms, followed by all the coconut. Pour sweetened condensed milk over the toppings and sprinkle the remaining toppings.
- Return to the oven and bake for an additional 25 minutes until edges are golden and center is set.
- Allow the bars to cool completely in the pan before cutting into squares.
- Store in a sealed container at room temperature for up to one week.
Notes
- The addition of nuts is optional.
- To avoid burning, cover with foil if the top browns too quickly.
- These bars can be enjoyed at room temperature.
- Prep Time: 15 minutes
- Cook Time: 45 minutes
- Category: Dessert
- Method: Baking
- Cuisine: American
Nutrition
- Serving Size: 1 square
- Calories: 250
- Sugar: 20g
- Sodium: 150mg
- Fat: 12g
- Saturated Fat: 7g
- Unsaturated Fat: 4g
- Trans Fat: 0g
- Carbohydrates: 33g
- Fiber: 2g
- Protein: 3g
- Cholesterol: 50mg