
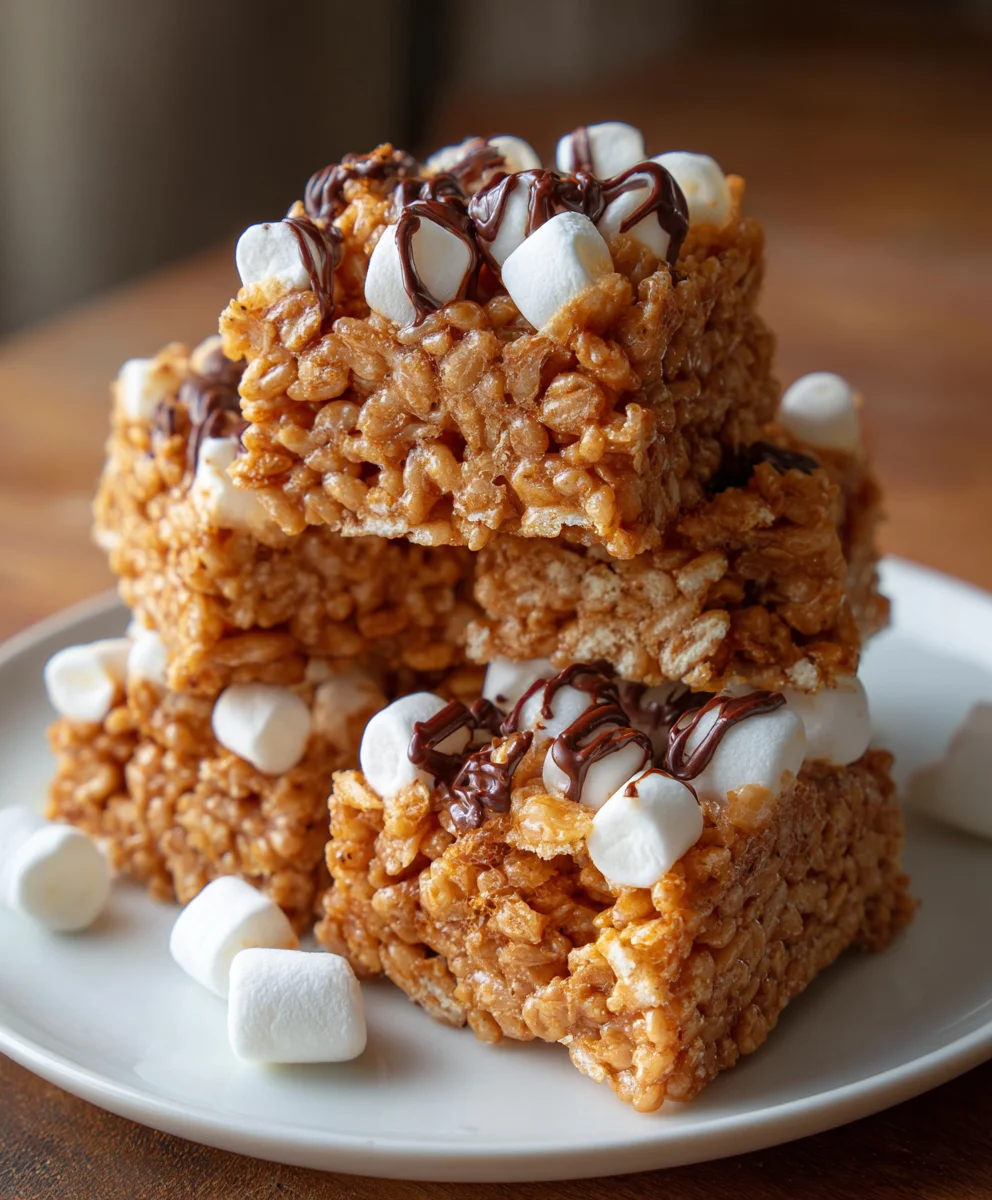
Introduction to No-Bake Coffee Crunch Rice Krispie Cookies
Some days feel like a whirlwind, don’t they? Between juggling work, family, and personal time, baking can seem like a luxury we just can’t afford. That’s where these No-Bake Coffee Crunch Rice Krispie Cookies come to the rescue! They’re the perfect blend of crunchiness and coffee flavor, making them a delightful treat for coffee enthusiasts and cookie lovers alike. Best of all, they come together effortlessly—no oven required! In just a matter of minutes, you can whip up a batch that will have everyone satisfied. Ready to dive into this delicious discovery? Let’s get started!
Why You’ll Love This No-Bake Coffee Crunch Rice Krispie Cookies
Life gets hectic, and who has time to bake when you’re running on caffeine and deadlines? These No-Bake Coffee Crunch Rice Krispie Cookies are a game-changer! They come together in just under 30 minutes and require no baking—perfect for busy days. Plus, the rich coffee flavor dances on your taste buds, combining the childhood nostalgia of Rice Krispies with a grown-up twist. What’s not to love?
Ingredients for No-Bake Coffee Crunch Rice Krispie Cookies
To create these delightful No-Bake Coffee Crunch Rice Krispie Cookies, you’ll need a few simple ingredients that work together harmoniously. The star of the show, of course, is Rice Krispies cereal, which provides that signature crunch we all adore. You’ll also need unsalted butter to add richness and help bind the ingredients together.
Brown sugar brings a touch of sweetness and depth, while honey or corn syrup adds stickiness, ensuring your cookies hold their shape. For those who crave that bold coffee flavor, instant coffee granules are a must. Adjust the amount based on your preferred strength. A splash of vanilla extract introduces a warm note, and a pinch of salt rounds out the flavors beautifully. Lastly, mini marshmallows offer gooey sweetness. Feel free to get creative by adding optional chocolate chips or chopped nuts for extra flair! You can find exact measurements at the end of this article for your convenience.
How to Make No-Bake Coffee Crunch Rice Krispie Cookies
Step 1: Prepare Your Workspace
Before diving into the delicious world of these No-Bake Coffee Crunch Rice Krispie Cookies, take a moment to set up your space. A clean, organized workspace is essential for efficient cooking. It keeps you focused, and trust me, it makes cleanup a breeze after you’re done. Gather all your ingredients and tools, and let’s get to it!
Step 2: Make the Coffee Syrup
Grab a medium saucepan and set it over medium heat. Start by adding the unsalted butter, brown sugar, honey (or corn syrup), and those magic instant coffee granules. Stir gently as the mixture warms up. It should start to bubble softly, blending those flavors beautifully together. Keep stirring until the mixture is smooth, with no lumps in sight. Once it achieves a glossy sheen, remove it from the heat and mix in the vanilla extract and a pinch of salt to enhance the flavor. Isn’t it heavenly? The aroma alone is worth it!
Step 3: Combine the Ingredients
Now, it’s time to mix up that magic! In a large mixing bowl, throw in the Rice Krispies cereal and mini marshmallows. Next, pour your warm coffee syrup over this crunchy goodness. It’s crucial to stir quickly! You want to make sure everything gets evenly coated before the syrup sets. I like to use a sturdy spatula or my hands (it’s worth it!) to combine. Just dive in and ensure every morsel is covered with that delicious coffee blend. Don’t let this step linger; speed is your friend!
Step 4: Form the Cookies
With your cookie mixture ready, it’s time to shape those goodies! Using a cookie scoop or your hands, grab about two tablespoons of the mixture and form them into small cookie shapes. Place them onto the prepared baking sheet, ready to set. Remember, work quickly! The mixture will start to harden as it cools, so you want to keep the flow going. Feel free to shape them into various sizes; just keep them bite-sized for that perfect deliciousness!
Step 5: Let Them Set
After forming your cookies, it’s time for the all-important setting phase. Allow them to cool and firm up at room temperature for about 20-30 minutes. If you’re in a hurry (and who isn’t sometimes?), you can pop the tray in the refrigerator for about 10-15 minutes to speed up the process. Just be patient! The anticipation of enjoying your No-Bake Coffee Crunch Rice Krispie Cookies will make it worth the wait.
Step 6: Optional Additions
This is where you can have a little fun! If you’re feeling creative, consider drizzling some melted chocolate over the top of your cookies for an extra sweet touch. You can also sprinkle them with chopped nuts for added crunch. It’s all about making these treats your own!
Step 7: Serve and Enjoy
Finally, it’s time to savor the fruits of your labor! Store any leftovers (if there are any!) in an airtight container at room temperature for up to a week. These cookies are delightful on their own or paired with a cup of coffee or tea. The best part? You can share them with friends or keep them all to yourself—no judgment here!
Tips for Success
- Gather all your ingredients before starting to streamline the process.
- Make sure to stir the coffee syrup just until smooth; don’t overheat it!
- For even coating, be quick when mixing the Rice Krispies with the syrup.
- When forming cookies, wet your hands slightly to prevent sticking.
- Let the cookies cool completely for the best texture.
Equipment Needed
- A medium saucepan for making the coffee syrup.
- A large mixing bowl to mix your ingredients.
- A cookie scoop or your hands for shaping the cookies.
- Parchment paper or a silicone baking mat for the baking sheet.
- A sturdy spatula for easy mixing.
Variations
- For a gluten-free option, substitute gluten-free Rice Krispies to enjoy these cookies without concern.
- Add a splash of flavored coffee syrup, like hazelnut or vanilla, to enhance the taste.
- For a richer texture, mix in some chopped dried fruits or coconut flakes.
- Try using flavored chocolate chips, like dark chocolate or mint, for an exciting twist.
Serving Suggestions
- Pair these delightful No-Bake Coffee Crunch Rice Krispie Cookies with a steaming cup of coffee for a perfect afternoon pick-me-up.
- A glass of cold milk is a classic complement, balancing the cookies’ sweetness.
- For a lovely presentation, arrange the cookies on a colorful platter; it’s sure to impress!
- Consider wrapping them as gifts for friends—everyone loves a homemade treat!
FAQs about No-Bake Coffee Crunch Rice Krispie Cookies
If you still have questions about these delicious No-Bake Coffee Crunch Rice Krispie Cookies, you’re not alone! I’ve gathered some frequently asked questions to help ensure your baking adventure is smooth and enjoyable.
How should I store these cookies?
To keep your cookies fresh, store them in an airtight container at room temperature. They should last for about a week before losing their delightful crunch. If you prefer a longer shelf life, consider refrigerating them for even fresher taste.
Can I substitute ingredients?
Absolutely! If you’re out of brown sugar, you can use regular granulated sugar. Honey can be swapped for corn syrup, and feel free to adjust the instant coffee amount according to your taste. Just remember, these changes may slightly alter the flavor!
What if my cookies are too sweet?
If you find the cookies too sweet for your taste, you can reduce the amount of brown sugar or choose a less sweet syrup. Using dark chocolate chips instead of milk chocolate can also balance out the sweetness beautifully.
Can I make these cookies gluten-free?
Yes! Simply choose gluten-free Rice Krispies, and you’ll have a delicious treat that everyone can enjoy. It’s easy to make these cookies inclusive for all dietary needs!
Can I freeze the cookies?
You sure can! To freeze, place them in a single layer on a baking sheet and put them in the freezer until solid. Once frozen, transfer them to an airtight container or freezer bag. They’ll retain their flavor and texture for about a month, so you can enjoy them anytime!
Now you’re all set to create your No-Bake Coffee Crunch Rice Krispie Cookies! With these tips, your baking journey should be as delightful as the treats themselves. Enjoy!
Final Thoughts
There’s something truly special about creating and sharing these No-Bake Coffee Crunch Rice Krispie Cookies with those we love. Each bite is not just a treat, but a memory in the making, perfect for any casual gathering or cozy afternoon at home.
With their easy preparation and delightful taste, these cookies can fit right into your busy schedule. So go ahead, whip up a batch, and indulge in the joy of treating yourself and your loved ones. Enjoy every crunchy, coffee-flavored morsel, guilt-free and full of love!
Print
No-Bake Coffee Crunch Rice Krispie Cookies
- Total Time: 30-45 minutes
- Yield: 24 cookies 1x
- Diet: Vegetarian
Description
Delicious no-bake cookies combining the crunch of Rice Krispies with the rich flavor of coffee, perfect for a quick treat.
Ingredients
- 3 cups Rice Krispies cereal
- 1/2 cup unsalted butter
- 1/2 cup brown sugar, packed
- 1/4 cup honey or corn syrup
- 2 tablespoons instant coffee granules (adjust for desired strength)
- 1/2 teaspoon vanilla extract
- 1/4 teaspoon salt
- 1 cup mini marshmallows
- Optional: chocolate chips, chopped nuts, or a drizzle of melted chocolate
Instructions
- Prepare Your Workspace: Line a baking sheet with parchment paper or a silicone baking mat.
- Make the Coffee Syrup: In a medium saucepan, combine the butter, brown sugar, honey, and instant coffee granules. Heat over medium heat, stirring occasionally, until the mixture is smooth and begins to bubble gently. Remove from heat and stir in vanilla extract and salt.
- Combine the Ingredients: In a large mixing bowl, add the Rice Krispies cereal and mini marshmallows. Pour the coffee syrup over the cereal mixture and stir quickly until everything is evenly coated.
- Form the Cookies: Using a cookie scoop or your hands, form the mixture into small cookie shapes (about 2 tablespoons each) and place them onto the prepared baking sheet. Work quickly, as the mixture will harden as it cools.
- Let Them Set: Allow the cookies to cool and set for about 20-30 minutes at room temperature. For faster setting, place the tray in the refrigerator for 10-15 minutes.
- Optional Additions: If desired, drizzle melted chocolate over the cookies or sprinkle with chopped nuts.
- Serve and Enjoy: Store the cookies in an airtight container at room temperature for up to a week.
Notes
- Adjust the amount of instant coffee based on your taste preference.
- For added flavor, consider using flavored chocolate chips.
- Ensure your cooking temperature is medium to avoid burning the syrup.
- Prep Time: 15 minutes
- Cook Time: 10 minutes
- Category: Dessert
- Method: No-Bake
- Cuisine: American
Nutrition
- Serving Size: 1 cookie
- Calories: 120
- Sugar: 8g
- Sodium: 50mg
- Fat: 6g
- Saturated Fat: 4g
- Unsaturated Fat: 2g
- Trans Fat: 0g
- Carbohydrates: 15g
- Fiber: 0g
- Protein: 1g
- Cholesterol: 15mg