
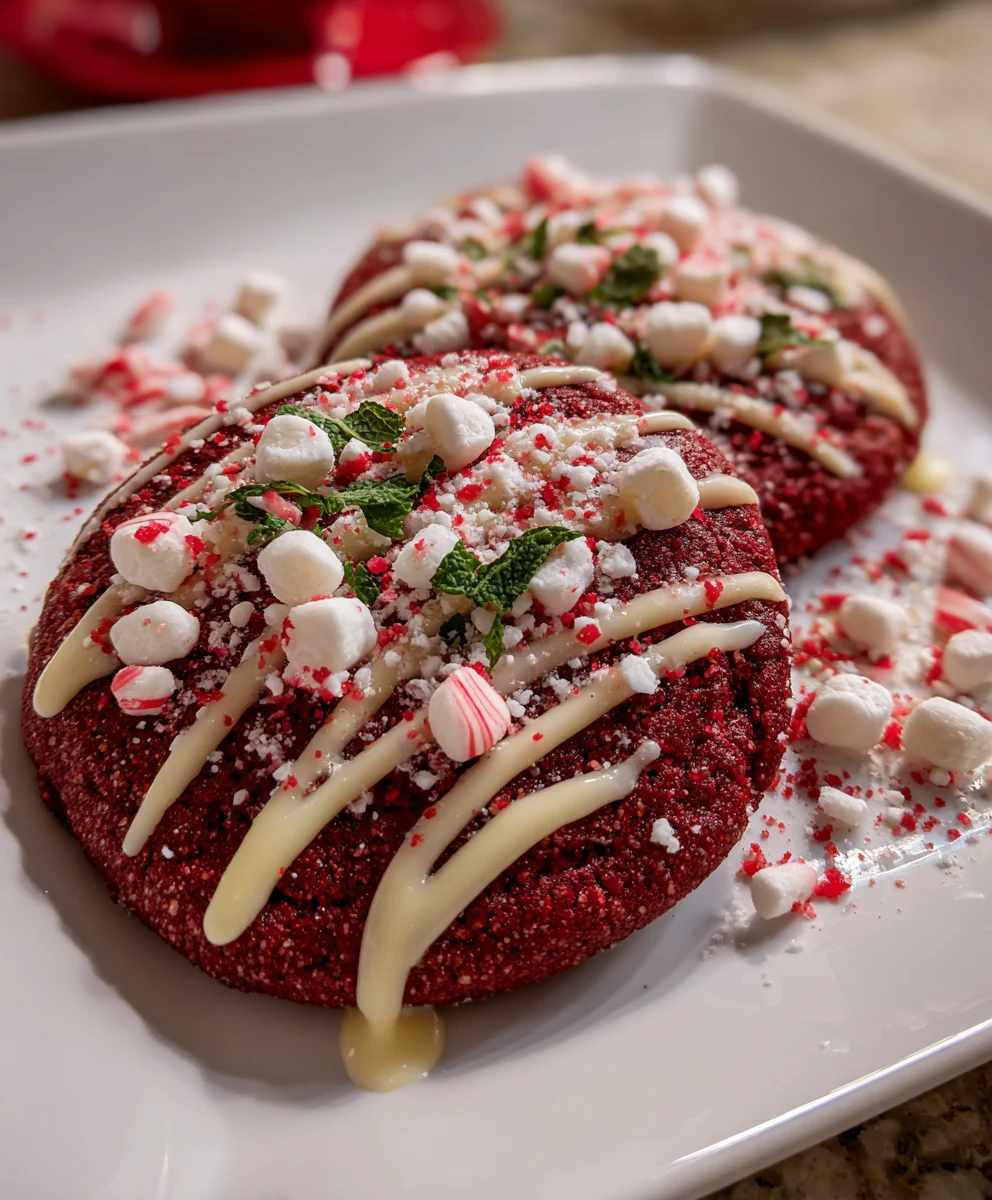
Introduction to Red Velvet Santa Cookies
There’s something magical about the holiday season, isn’t there? The twinkling lights, the cozy sweaters, and, of course, the sweet smell of cookies baking in the oven. One of my favorite festive treats are these delightful Red Velvet Santa Cookies. They not only look stunning with their vibrant color, but they also deliver a rich, velvety flavor that is sure to impress. These cookies are perfect for family gatherings, making memories, and sharing joy. Plus, they’re fun to create together with your loved ones, generating laughter and cheers in your kitchen!
Why You’ll Love This Red Velvet Santa Cookies
If you’re a busy mom or professional, these Red Velvet Santa Cookies are perfect for you! They come together quickly, making them a breeze to whip up during your hectic holiday season. The vibrant red hue and delightful taste will instantly brighten your festivities. Plus, mixing in chocolate chips and marshmallows adds a fun twist. They not only look great, but they also taste extraordinary, bringing smiles all around!
Ingredients for Red Velvet Santa Cookies
To create these festive Red Velvet Santa Cookies, you’ll need a delightful mix of ingredients:
- Unsalted butter: This adds richness and creates a tender cookie.
- Sugar: Sweetness is essential! It also helps in achieving a nice texture.
- Eggs: They bind the ingredients, making the cookies fluffy and soft.
- Vanilla extract: A splash of this gives your cookies that warm, comforting flavor.
- Red food coloring: For that gorgeous red hue that screams holiday spirit.
- Cocoa powder: It provides a subtle chocolate flavor that complements the red velvet.
- Baking soda: This helps the cookies rise just right.
- Cornstarch: It adds to the softness, making each bite melt in your mouth.
- Kosher salt: A key player for balancing sweetness.
- Cake flour: Ensures a light, delicate crumb.
- All-purpose flour: A staple for structure!
- Semi-sweet chocolate chips: Delightful bursts of chocolate in every bite.
- Mini marshmallows: These add a fun chewy texture.
- Crushed peppermints: A festive crunch with a refreshing flavor.
Feel free to get creative! Substitutions like gluten-free flour or dairy-free butter can easily fit your dietary needs. Exact measurements are provided at the end for convenience.
How to Make Red Velvet Santa Cookies
Step 1: Preheat the Oven and Prepare Baking Sheets
First things first! Preheat your oven to a warm 410º F. This step is crucial as it ensures even baking. Next, line two baking sheets with silicone mats. These mats help your cookies bake evenly while preventing sticking. Trust me; silicone mats are total game-changers!
Step 2: Cream Butter and Sugar
In a large mixing bowl, cream together the cubed unsalted butter and sugar. Use a mixer on medium speed for about three minutes. You want a fluffy, light mixture that’s pale in color. This step is key; it creates air pockets for lightness in your cookies. Don’t rush it—you’ll be rewarded with perfectly textured treats!
Step 3: Incorporate Eggs and Flavoring
It’s time to add the eggs! Incorporate one egg at a time, mixing well after each addition. Once both eggs are blended in, stir in the pure vanilla extract for warming flavor. These ingredients help to bind and create that delightful, soft texture you want in your Red Velvet Santa Cookies.
Step 4: Add Food Coloring and Mix Well
Now comes the fun part! Add in your red food coloring, using a spatula to blend it gently. Aim for a vibrant, merry red hue but avoid overmixing. You want that stunning color to shine through without your cookies becoming tough. The festive look is half the magic!
Step 5: Combine Dry Ingredients
In a separate bowl, whisk together your cake flour, all-purpose flour, cocoa powder, baking soda, cornstarch, and kosher salt. This ensures even distribution of dry ingredients throughout the dough. Each component plays a role: the cocoa adds flavor, while the baking soda helps them rise, creating a soft, velvety texture.
Step 6: Mix Together and Add Extras
With the mixer on low, gradually combine the flour mixture into your creamy bowl. Mix just until a soft dough forms. Then, fold in the semi-sweet chocolate chips, mini marshmallows, and crushed peppermints with a spatula. Be gentle here to keep that gooey goodness intact—overmixing is a no-no!
Step 7: Chill the Dough
Now, scoop the dough into a bowl and refrigerate it uncovered for about 20 minutes. Chilling the dough is essential; it firms up the fat, resulting in a better texture once baked. Plus, it helps the cookies maintain their shape!
Step 8: Scoop and Shape Cookies
Using a large cookie scoop, portion out dough balls, around 3.5 oz each, and stagger them on your baking sheet. Gently press down to flatten them a bit. Space them well, as they will expand while baking. This little trick helps avoid cookie mayhem!
Step 9: Bake the Cookies
Pop the baking sheets in the oven and bake for 8 to 11 minutes. Keep an eye on them; the cookies are done when the edges are firm, but the centers look slightly gooey. That gooeyness is one of the best parts, so watch carefully!
Step 10: Cooling the Cookies
After baking, let the cookies cool completely on the baking sheets. This allows them to set and makes sure they don’t fall apart when you serve them. Store any leftovers in an airtight container at room temperature for a few days—if they last that long!
Tips for Success
To ensure your Red Velvet Santa Cookies turn out perfectly, keep these handy tips in mind:
- Make sure your butter is softened to room temperature for smooth creaming.
- Chill the dough as suggested for optimal texture and shape.
- Keep an eye on baking time to achieve that delightful gooey center.
- Experiment with additional toppings, like nuts or festive sprinkles, for a unique twist.
With these simple tips, your holiday baking will be merry and bright!
Equipment Needed
To whip up these delightful Red Velvet Santa Cookies, you’ll need a few essential tools:
- Mixing bowls: A large bowl for mixing and a smaller one for dry ingredients.
- Hand or stand mixer: For easy creaming and mixing.
- Cookie scoop: For portioning uniform cookie sizes.
- Baking sheets: Standard sheets lined with silicone mats or parchment paper.
- Whisk: To combine dry ingredients evenly!
Most of these tools are kitchen staples, making it easy to get started!
Variations
Get creative with your Red Velvet Santa Cookies by trying these tasty variations:
- Gluten-free: Substitute with a 1:1 gluten-free baking mix to accommodate those with sensitivities.
- Vegan: Use plant-based butter and flax eggs for a delightful dairy-free treat.
- Add-ins: Toss in chopped nuts, like pecans or walnuts, for a crunchy texture.
- Fruity twist: Incorporate dried cranberries or cherries for a burst of tartness.
Each variation enhances flavor and excitement, making your baking experience even more enjoyable!
Serving Suggestions
Enjoying your Red Velvet Santa Cookies is a festive experience on its own! Here are some delightful serving suggestions:
- Milk or Hot Chocolate: Pair your cookies with a cold glass of milk or warm hot chocolate for a cozy treat.
- Festive Platter: Arrange the cookies on a cheerful holiday platter for stunning presentation at gatherings.
- Ice Cream Sandwich: Sandwich a scoop of vanilla ice cream between two cookies for an indulgent dessert.
These simple additions elevate your cookie experience while spreading holiday cheer!
FAQs about Red Velvet Santa Cookies
Here are some common questions to help you on your baking journey:
Can I freeze the dough for later use?
Absolutely! You can freeze the dough before chilling it. Just wrap it tightly in plastic wrap and store it in an airtight container. When you’re ready to bake, let it thaw in the fridge before chilling and shaping.
How should I store my cookies?
Store your Red Velvet Santa Cookies in an airtight container at room temperature for up to five days. For longer freshness, consider freezing them!
Can I customize the toppings?
Definitely! Feel free to mix in your favorite treats, like nuts or dried fruit. The possibilities are endless, making each batch uniquely yours!
Final Thoughts
Baking these Red Velvet Santa Cookies isn’t just about creating delightful treats; it’s a chance to weave joy and warmth into the fabric of your holiday celebrations. The rich flavors and eye-catching color bring families together, sparking laughter and stories around the kitchen counter. Each batch is a step towards fostering cherished traditions and happy memories that last long after the holidays end. So, gather your loved ones, roll up your sleeves, and dive into this festive adventure. I promise these cookies will add a sprinkle of magic to your celebrations and create smiles all around!
Print
Red Velvet Santa Cookies
- Total Time: 31 minutes
- Yield: 24 cookies 1x
- Diet: Vegetarian
Description
These Red Velvet Santa Cookies are a festive treat perfect for the holiday season, combining rich red velvet flavor with fun toppings.
Ingredients
- 2 sticks unsalted butter, cubed
- 1 ½ cups sugar
- 2 large eggs, room temperature
- 1 tsp pure vanilla extract
- 2 tsp red food coloring
- ¼ cup unsweetened cocoa powder
- 1 tsp baking soda
- 1 tsp cornstarch
- ½ tsp kosher salt
- 1 cup cake flour
- 1 ¾ cup all-purpose flour
- 1 ½ cup semi-sweet chocolate chips
- 1 cup mini marshmallows
- 1 cup peppermints, crushed
Instructions
- Preheat the oven to 410º F.
- Line 2 baking sheets with silicone baking mats and set aside.
- In a large mixing bowl, cream the butter and sugar on medium speed for 3 minutes until fluffy and light in color.
- Add one egg at a time, stirring in the vanilla after both eggs.
- Add the red food coloring and beat at low speed until combined.
- In a separate bowl, whisk together flour, cocoa, baking soda, cornstarch, and salt.
- With the mixer on low, slowly add the flour mixture to the butter mixture until a soft dough forms.
- Mix in the chocolate chips, mini marshmallows, and crushed peppermint.
- Refrigerate the dough uncovered for about 20 minutes or until chilled.
- Use a large cookie scoop to create 3.5 oz dough balls and stagger them on the baking sheet, lightly pressing them to flatten.
- Bake for 8-11 minutes, being careful not to over-bake; the center should be slightly gooey.
- Allow the cookies to cool completely.
Notes
- For best results, make sure the butter is softened to room temperature before starting.
- Do not skip refrigerating the dough to achieve the right texture.
- Prep Time: 20 minutes
- Cook Time: 11 minutes
- Category: Dessert
- Method: Baking
- Cuisine: American
Nutrition
- Serving Size: 1 cookie
- Calories: 150
- Sugar: 12g
- Sodium: 80mg
- Fat: 7g
- Saturated Fat: 4g
- Unsaturated Fat: 2g
- Trans Fat: 0g
- Carbohydrates: 20g
- Fiber: 1g
- Protein: 2g
- Cholesterol: 30mg